![]()
![]()
Import Payment Records
This function is to Import (upload) Customer payment data into CRC from an external file. After you Import the data, you will need to apply it to the system using the Apply Payment Records function. Note: Users are not required to do the Import process to add Payment Records. Users can manually add batch files and associated Payment Records using the Apply Payment Records function.
NOTE: External Payment data files are created outside of CRC and must have a specific format. Click on the following link for information about how to set up the file: Import File Formats.
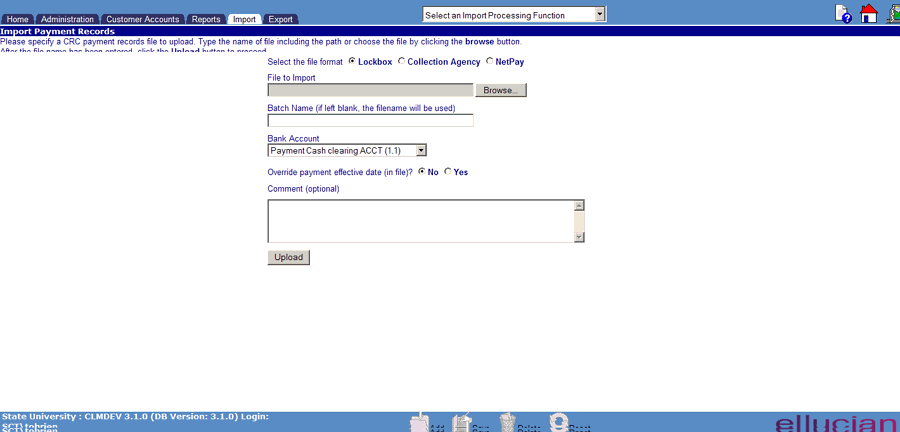
To Import a file, enter your data on the Import Payment Records Screen and click on the Upload button. When the upload is complete, you are notified, and the system creates an entry on the Apply Payment Records screen. Your data is now ready to be applied to the system. Note: You may receive errors.
To Import additional files, click on the Upload Additional Files link. This returns you to the file name entry screen.
|
Field Name |
What to enter |
| Select the file format | Make your selection using the radio button provided. Lock Box,Collection Agency or Net Pay. |
|
File to Import |
The first step in the upload process is to provide the name of the data file that is to be uploaded. The file can be located on any directory or file server that can be reached by the user's client. |
| Batch Name |
Batch Name is optional and may be used to further identify the batch of payments. |
|
Bank Account |
Bank Account is the ledger account of the Loan/Receivable to be debited. The Bank Account defaults to the one listed in the Payment Parameters within System Configuration under the Administration tab. You can override the default by selecting another ledger account from the drop-down list. The Bank Account chosen will be credited for the amount of the Loan/Receivables within the file. |
| Override Payment Effective Date (in file) |
Override payment effective date defaults to NO and will
cause the payments to be Imported with the payment date specified on the individual
payment record. Select Yes and provide
a date if you want all payments to reflect the same effective (posting) date. |
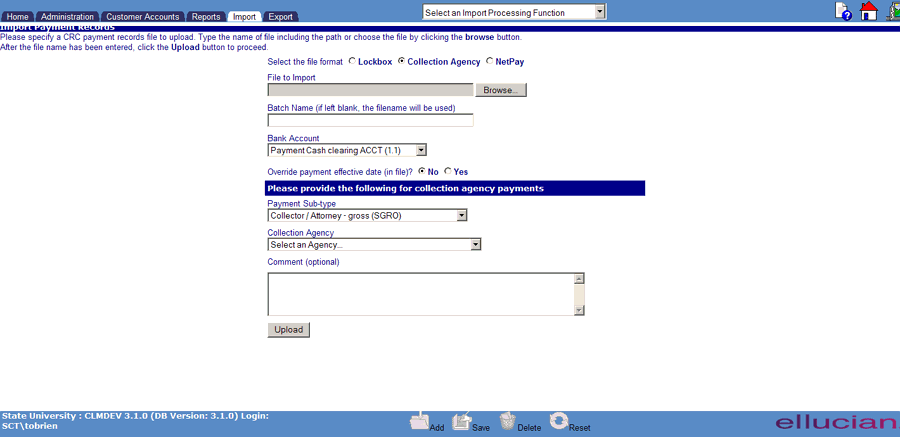
| Collection Agency Payments | Please provide the following when selecting the File Format 'Collection Agency' |
| Payment Sub-Type |
Descriptins may be added and/or edited in OM/CodedDataValueMtnce-PYMT. Make selection from drop-down list to attach to each payment record in the batch. |
| Collection Agency |
Collection Agency – select the agency from which these payments were received. Payments will be applied to only those Loan/Receivables attached to the selected agency. Make selection from the dropdown list. |
| Comment | Provides for a comment to be entered for each customer in the file. Both a History record and Comment Log entry will be created. |
After the file name has been entered, click the Upload button to continue with the (upload) process. When the Upload button is clicked, the file name extension will be verified, as will the file’s presence at the specified location.
Upload will load the file into CRC and make it available for application in Import, Apply Payment Records. Upload will indicate via a message whether the upload was successful or not.
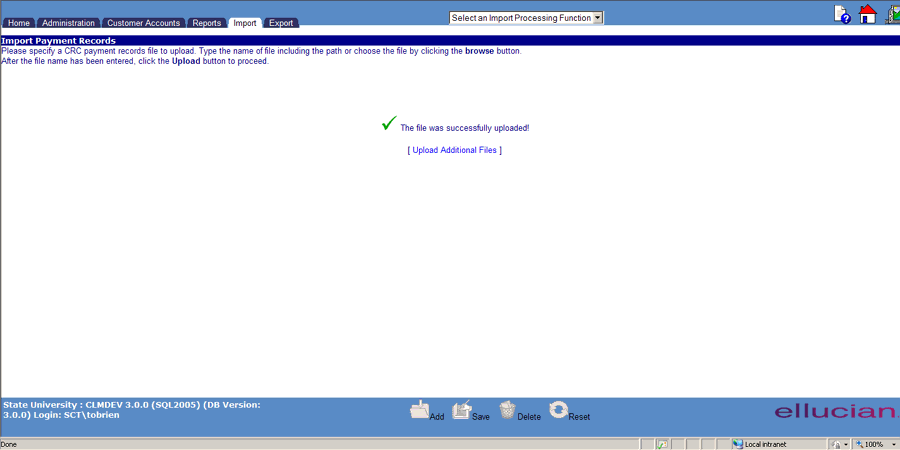
If the Upload process is successful the user will be notified as shown in the following example:

The CRC system will make a table entry to indicate that the specified file was uploaded and awaiting application. See Apply Payment Records for additional information on how to view this entry and how to apply the data contained in the uploaded file.
The user can return to the file name entry screen and provide the names of additional files to be uploaded by clicking the Upload Additional Files link.
The Upload process can potentially result in one of three errors. Each of these is described below.
If the user does not enter a file name and then clicks the Upload button, an error occurs. Reselect Import Payment Records from the Import Processing drop-down list to enter a file name and proceed with the Import process.
File Not Found/File Empty
If the user provides a file name, and either the CRC system cannot find the file at the specified location, or the file is located but is found to be empty (contains no records), an error occurs. The invalid file name is provided to the right of the File: string located in the error message. Click the Upload Additional Files link to enter a valid file name and proceed with the Import process.
NOTE: The file will be partially uploaded if possible. The record set associated with the invalid school code/campus code will be discarded, and the remaining record sets uploaded if they are free from error.

Import
Payment Records Screen Sample (With Collection Agency Selected)