This report is produced when Queued Mail is selected from the Reports drop-down list. The report is a listing of all unprinted mail in the system. A separate detail line is produced for each unprinted mail item. Each detail line identifies the SSN, borrower name, letter type, letter code, letter description, date the letter was added to the borrowers mail queue, user who added the letter and the number of copies to be printed. The report detail lines can be sorted by SSN, Borrower Name, Letter Code, Mail Date or User. In addition, the mail can be filtered by All Types, Letterhead or Non-Letterhead.
The Queued Mail option provides the ability to print mail that has been created by any or all users of the system.
When Queued Mail is selected, the top portion of the Reports screen is replaced with a parameter entry window as shown in the following example:

The parameter values that are entered will restrict the scope of the report as follows:
Show Mail Requested By: Required parameter. This will default to the current user but can be changed to a different user or to include all users. This restricts the mail selection to those items created by the selected user.
Between Date: Required parameter. Only unprinted mail items having a transaction date greater than or equal to the supplied date value will be selected. Defaults to the current date.
Through Date: Required parameter. All unprinted mail items having a transaction date less than or equal to the supplied date value will be selected. Defaults to the current date.
All Types: This option will display all unprinted mail items.
Letterhead: This option will display only Letterhead mail items.
Non-Letterhead: This option will display all Non-Letterhead mail items.
Sort: This option displays the sort options for the report.
The user should enter the desired parameter values and then click the Show Mail button to generate the report. If either of the date values is not entered, or an invalid date is entered, the error message similar to the following will be displayed:
The following is a sample Queued Mail report:
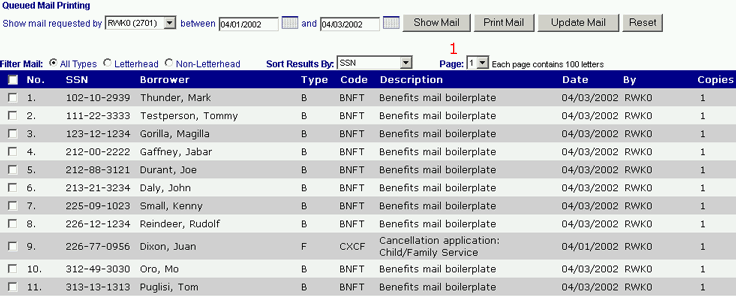
The report will display pages of mail in groups of 100. If more than one page of letters is produced, the user should select the next page from the Page picklist (1 above), and click on the Show Mail button. The appropriate page of mail items will display.
The data elements which comprise the Queued Mail report are described in the following table:
|
Column Name |
Description |
|
SSN |
The SSN of the borrower to receive the letter. |
|
Borrower Name |
Name of the borrower. |
|
Type |
The letter type as defined for the particular letter in the letter table. |
|
Code |
The Code Type of the letter as defined in the letter table. |
|
Description |
Description of the letter from the letter table. |
|
Date |
The date the letter was created/added to the borrowers mail queue |
|
By |
The user ID of the person that created/added the mail item to the borrowers mail queue. |
|
Copies |
The number of copies of the letter to be printed. |
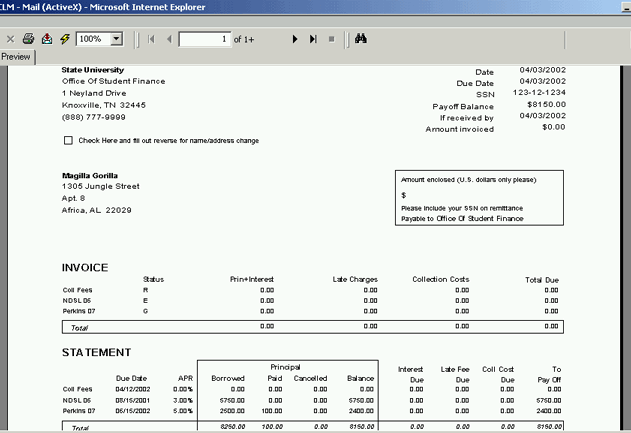
To view a mail item, check the appropriate line number(s) and click on the Print Mail button. When this icon is clicked, a Crystal Reports report viewer is opened via a Java applet. As shown in the following example, the report viewer contains the following:
A read-only formatted display of the document
Control buttons which can be used to perform a variety of functions, including page through the document, print the document to a local printer, and export the document to an external file. Click on the following link for a description regarding the use of the report viewer control buttons:
Update Mail
Clicking the Update Mail button will display a pop up window that provides processing options for the currently selected letters. The window will provide the following options and appear as shown below:
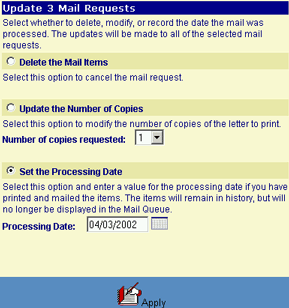
Delete: This will delete the selected mail items from the borrowers mail queue.
Update the Number of Copies: The user may modify the number of copies of each letter to be printed.
Set the Processing Date: This is the default option. The processing date will update the borrowers MAIL history record for the selected letter(s) and will remove the letter(s) from the borrowers unprinted mail queue.
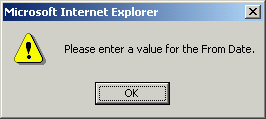
If the Update Mail button is clicked but no mail items have been selected, the following message will display:
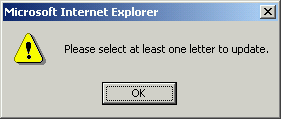
Click on the OK button to acknowledge the error and return to the entry form. Select the desired letter(s) and again click the Update Mail button.
Click on the Reset icon to restore the parameter values to their default state. Any data that was entered in the form will be erased from the display.