![]()
To view the contents of a borrower's Mail Queue, click on the magnifying glass icon located on the right side of the Borrower Mail section of the screen (see example below).
![]()
When this icon is clicked, a new window is opened (see example below) that contains the following:
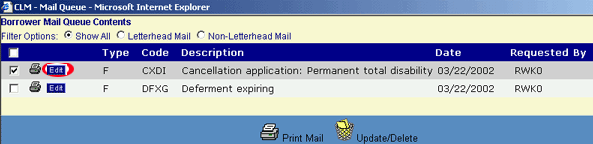
A listing of all (unprinted) items that are currently in the borrower's mail queue, as shown in the example below.
A function Bar that contains a Print Mail icon and a Update/Delete icon.

If there are no items in the borrower's mail queue (as evidenced by a zero displayed in the unprinted mail counter) and the magnifying glass icon is clicked, a message will be displayed as shown in the following example:

The top bar of the mail queue contains three radio buttons as shown below:

To view a mail item, click on the associated printer icon. When this icon is clicked, a Crystal Reports report viewer is opened via a Java applet. As shown in the following example, the report viewer contains the following:
A read-only formatted display of the document
Control buttons which can be used to perform a variety of functions, including page through the document, print the document to a local printer, and export the document to an external file. Click on the following link for a description regarding the use of the report viewer control buttons:

To edit a mail item, click on the Edit icon as shown below:
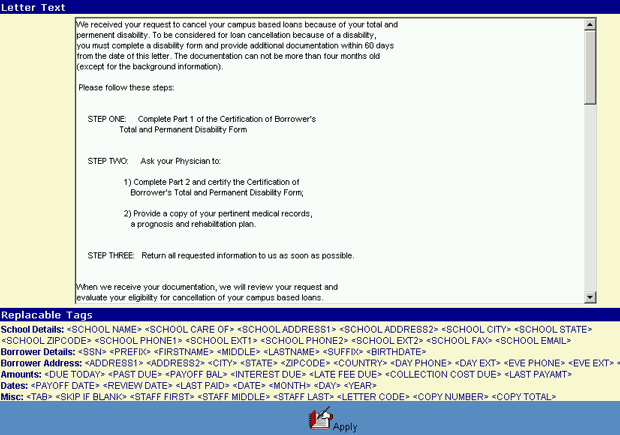
Clicking Apply will save the letter in it's modified form.
To delete an item from the borrower's Mail Queue, check the associated box and click the Update/Delete icon.

Clicking the Update/Delete icon will trigger the display of a pop-up dialog box that requests the user to confirm the Delete action. For example:

Click on the OK button to acknowledge the Delete action.
The selected item will be deleted from the Mail Queue, and the pop-up window will be closed. The Mail Queue List will be updated to reflect the deletion.