![]()
![]()
Loan/Receivable History
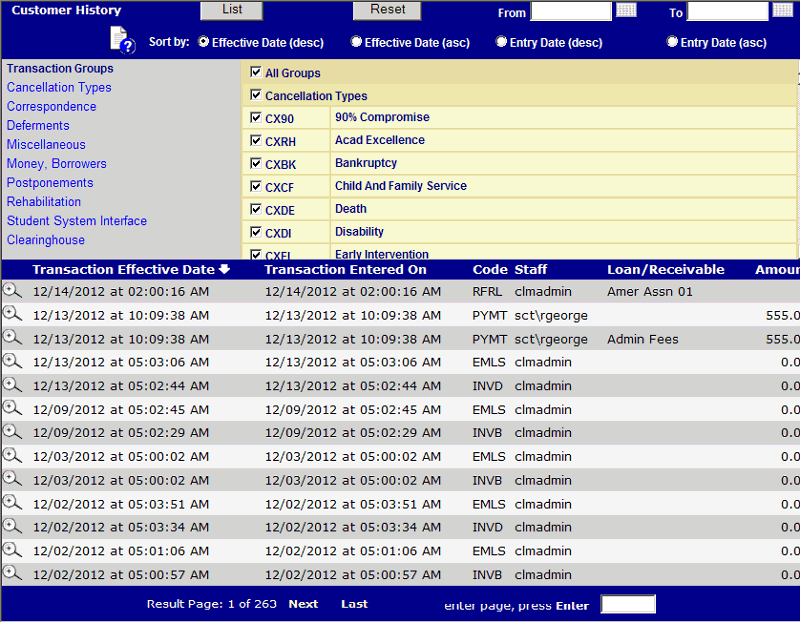
The history screen displays all history when using the Customer Services/ History function. It displays history for selected Loan/Receivable only when using the Account Grid/ History function. The screen will have the transactions effective date and transaction entered date. The transactions on the history screen are created as a result of other processes that were previously performed for this Customer. This could include applying a benefit, posting a payment, or generating mail. History entries cannot be manually generated.
When you first access this function, you will see the screen is comprised of an upper and a lower panel. The upper panel is used to specify which transaction code(s) should be retrieved. By default, all transaction groups and codes are selected. The lower panel provides a listing (of up to 15 per page) of the most recent history entries for the Customer, in descending date order. Each entry is represented by the date/time of the entry, the transaction code, and the ID of the user who created the entry (if any). The user can view any type of transactions as shown below:
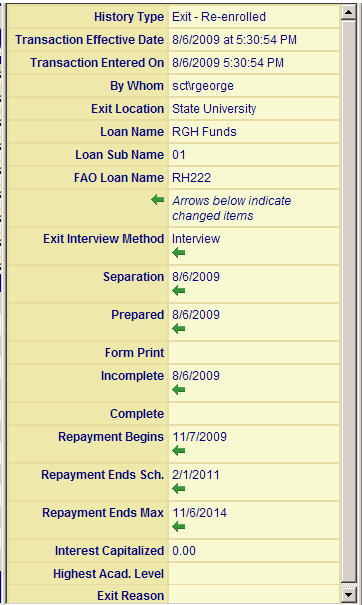
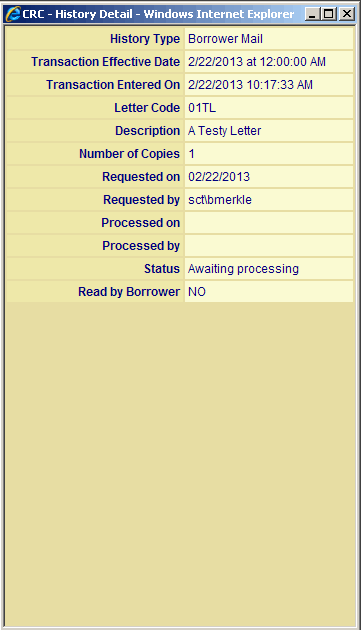
Click on the magnifying glass icon to the left of the transaction at the bottom of the screen and the history detail is displayed. If you are viewing history for a Loan/Receivable, Loan/Receivable History Detail is displayed.
The default is to Sort by Effective Date descendent. Click on one of the sort options, e.g. Effective Date (asc) and the lower panel will be reset sorted by Effective Date ascendant.
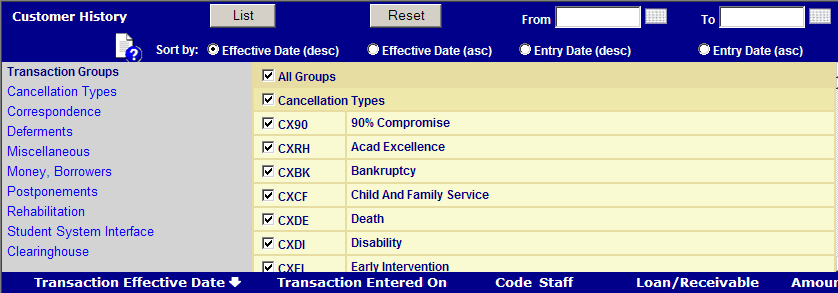
When the History screen is first entered, all transaction groups (and their associated transaction codes) are selected. To narrow down the search, history records can be retrieved by using one or more of the search filters provided in the upper panel of the History window. It is possible to retrieve history records by transaction group, transaction code, a combination of transaction group/code and date range, or all history records. How each filter is used is described in the following sections.
To select history records associated with only a particular transaction group(s) or code(s), perform the following steps:
· Deselect all transaction groups and codes by either "unchecking" the All Groups box, or by clicking on the Reset button. Either action will remove the check marks from all transaction groups and codes.

· Click on the Transaction Group. Alternatively, the user can manually scroll through the list of transaction groups to locate the desired Transaction Group Header.
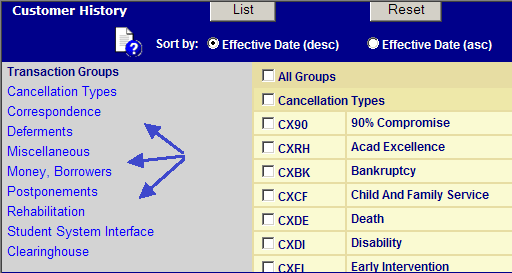
· When a link is clicked, the scrollable list of transaction groups and codes will be positioned to the Transaction Group Header. Select the Transaction Group, and all associated transaction codes will be automatically selected. One or more Transaction Groups can be selected in this manner. The other option is to select one or more codes within a Group.
· After selecting the desired transaction group(s) or code(s) click the List button to initiate the search. Any history entries whose transaction code matches the selected value(s) will be listed. If no matching entries are found, the user is notified via an informational message:

In addition to selecting history entries by Transaction Group and/or Code, the user can further restrict the search to a particular date range. This is accomplished by entering the desired start and stop dates in the From and Through fields (respectively), either by manually entering a valid date value or by using the Calendar icon to populate this field with a valid value and then click on the List button and the bottom panel is refreshed with the history entries whose transaction date occurs within the specified date range (and whose transaction code matches the selected value(s)) will be listed. If no matching entries are found, the user is notified via the informational message shown in the previous example.
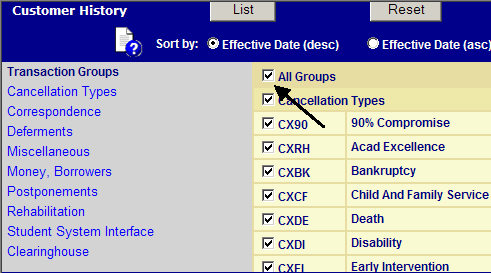
This is the default History filter and is employed when the History function is accessed via the Navigation Bar. Select all transaction groups and codes by checking the All Groups box (located at top of display), and then click the List button to initiate the search.
Clicking on the Reset button will deselect any currently selected Transaction Groups and/or Codes, and will also erase any values entered into the From and Through date fields.
©Ellucian Campus Receivables Collector Help Center