![]()
![]()
Import Clearinghouse Records
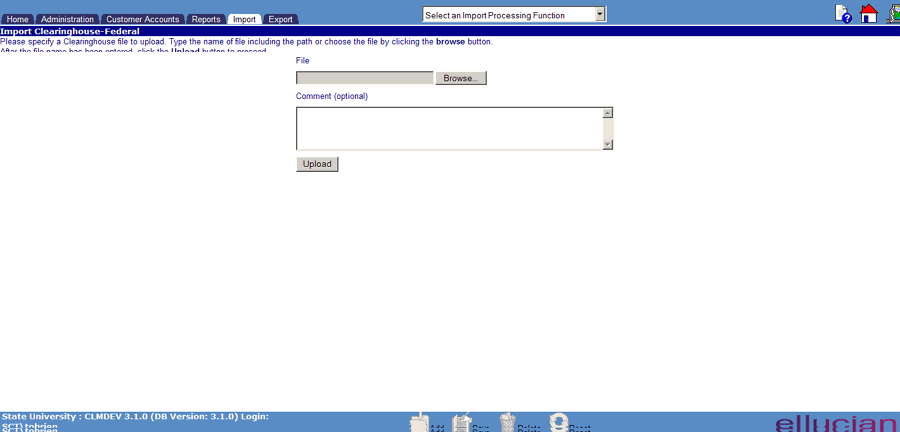
The first step is to Import (upload) your National Student Clearinghouse file which contains enrollment information for your Customers. Once uploaded, the data is then applied to the CRC database using the Apply Clearinghouse Records function. Based on your options in Administration/System Configuration/Clearinghouse Parameters, the application of this file will update the enrollment and deferments for your Customers.
NOTE: External Clearinghouse data files are created outside of CRC and must have a specific format. Click on the following link for information about how to set up the file: Import File Formats.
Import files reside in the Import Directory defined in Administration/System Configuration/Import- Export Parameters. After the file name has been entered, click the Upload button to continue with. When the Upload button is clicked, the file name extension will be verified, as will the file’s presence at the specified location. When the upload is complete, you are notified, and the system creates an entry on the Apply Clearinghouse. Your data is now ready to be applied to the system. Note: You may receive errors.
To Import additional files, click on the Upload Additional Files link. This returns you to the file name entry screen.
If the Upload process is successful the user will be notified as shown in the following example:

See Apply Clearinghouse for additional information on how to view this entry and how to apply the data contained in the uploaded file.
The Upload process can potentially result in one of three errors. Each of these is described below.
If the user does not enter a file name and then clicks the Upload button, an error occurs. Reselect Import Clearinghouse Records from the Import Processing drop-down list to enter a file name and proceed with the Import process.
If the user provides a file name without an extension of ".lbx", and then clicks the Upload button, an error occurs. The invalid file name is provided to the right of the File: string located in the error message. Click the Upload Additional Files link to enter a valid file name and proceed with the Import process.
If the user provides a file name, and either the CRC system cannot find the file at the specified location, or the file is located but is found to be empty (contains no records), an error occurs. The invalid file name is provided to the right of the File: string located in the error message. Click the Upload Additional Files link to enter a valid file name and proceed with the Import process.

©Ellucian Campus Receivables Collector Help Center