![]()
![]()
Create Exit Batch
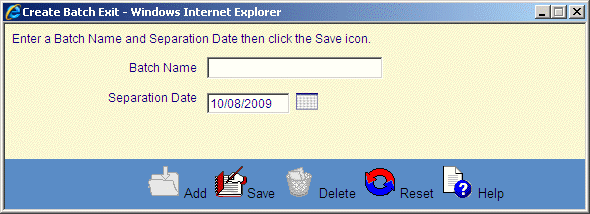
This screen is displayed when clicking on the Add icon in the Apply Exit Records screen. This function is used to as an alternative to Importing an external Exit records file. The user can manually create a batch of Loan/Receivable records. The first step in this process is to create the batch that will hold the records, and to give it a file name. The next step would be to add records manually by clicking on the Add Records link in the Apply Exit Records screen.
The user enters a batch name comprised of up to 25 alphanumeric characters and separation date. This date defaults to the current date, but you can modify it. It will be the exit date assigned to all Customers being exited in the batch.
The user should enter the desired Batch Name and Separation Date (indicates the effective date of non-enrollment) and click Save icon in the function bar to add the file to the database. The file will then display as an Imported, but empty file in the Apply Exit Records screen.
