![]()
![]()
Create Exit Records
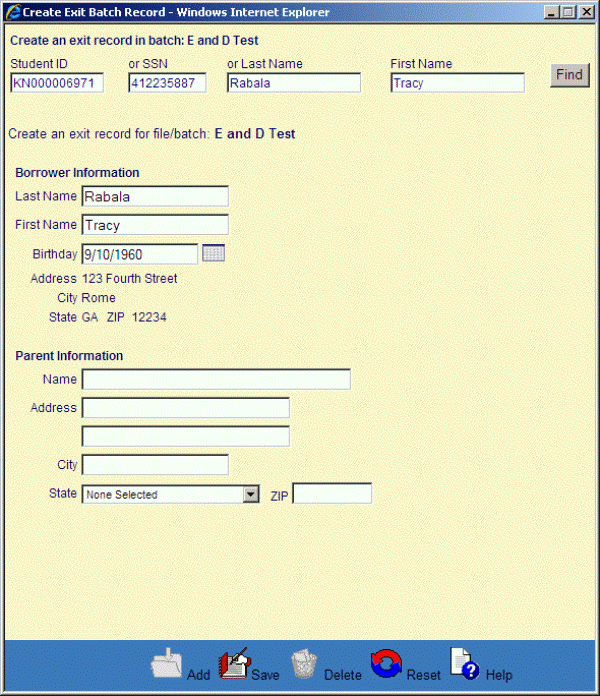
This screen is displayed when clicking on the Add Records in the Apply Exit Records screen. This function is used to manually create Exit records for an existing file. The user can add a new Customer and associated Loan/Receivable, add a Loan/Receivable for an existing Customer, or modify Customer address information.
To create a new batch file, the user can perform the Create a New Exit Batch file function.
To add a Customer to an existing batch, the user can search for the Customer using the Social Security Number, Customer ID, Last Name and First Name fields and then click on the Find button. Once found, the Customer information is displayed. To add this Customer to the batch file, click on the Save icon in the function bar and the Apply Exit Records screen will be displayed adding the Customer record.
*Required Fields
|
Field Name |
Purpose/Usage |
|
Customer INFORMATION |
Note: Although there are fields described below that appear like they can be edited, they are not allowed as this time, except for the Date of Birth. |
|
Last Name |
Default |
|
First Name |
Default |
|
Birthday |
Edit or enter the Customer’s date of birth (mm/dd/yyyy), or click on the calendar icon to enter a date. |
|
PARENT INFORMATION |
|
|
Name |
You can add or edit the parent’s Last Name. |
|
Address |
You can add or edit the parent’s address. |
|
City |
You can add or edit the parent’s city. |
|
State |
You can add or edit the State by selecting the State from the drop-down box. |
|
Zip |
You can add or edit the parent’s address zip code. |
