![]()
![]()
Reports Display Navigation
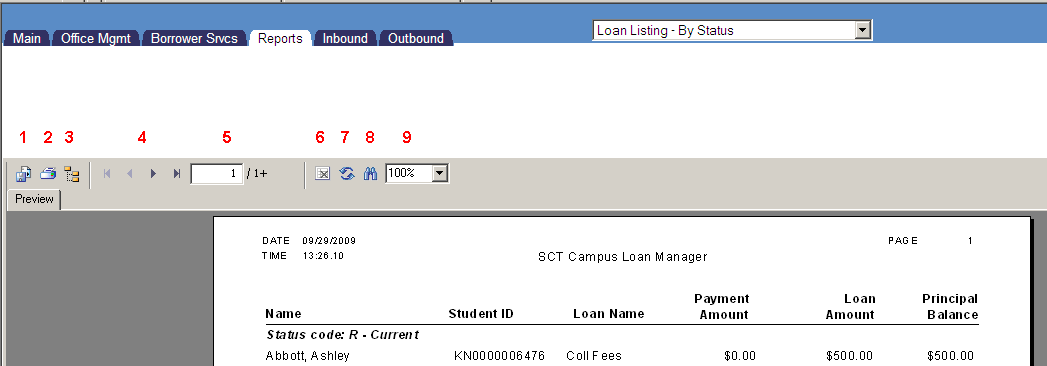
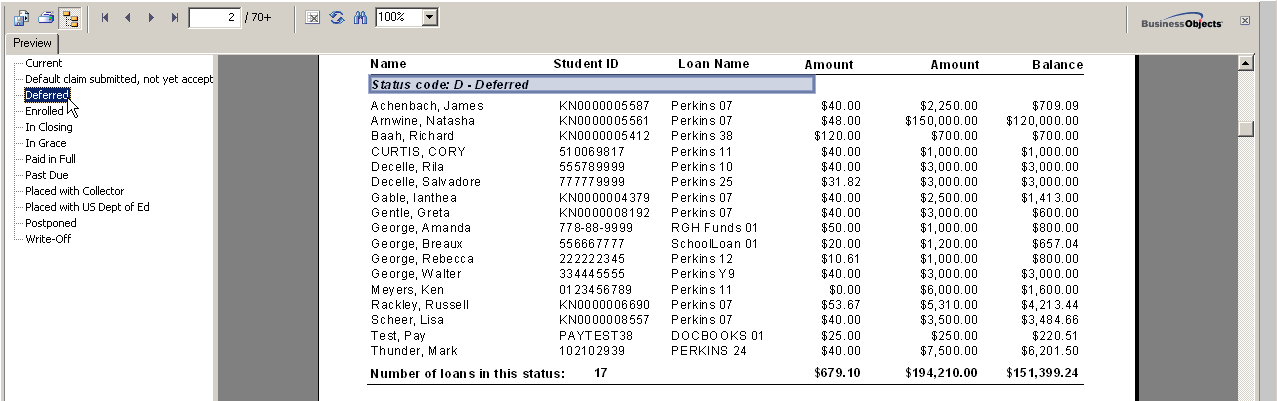
The CRC system uses the Crystal Reports report viewer to display a variety of information to the user. The report viewer is initialized by selecting a report in the Report tab. Note: Some reports may require parameters to be selected before the report is displayed. See Reports Functions Overview for more detail.
When the report viewer is initialized, the document itself (a letter, invoice, report, etc.) is displayed in the body of the report viewer, within the window labeled "Preview". Only one page of the document is displayed at a time in the Preview window.
The top portion of the report viewer consists of a set of buttons or controls which can be used to perform a variety of actions. Each of these controls (see items 1-9 in the example below) is described in the following subsections:
2. Print
5. Page Number
6. Stop Loading
7. Refresh Data
8. Search Text
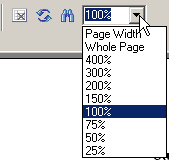
9. Zoom Control
The Export button (item 1 in the above example) can be used to export the entire document to a local file in a specific format (see selection list image below). When the Export button is clicked, a dialog box is displayed. Select the desired output format from the drop down box, and specify the output file name and directory path in the Save To box. The Browse button can be used to locate the desired directory path; this path may be either local to the user's PC, or on a network drive. Once the required output format and destination have been specified, click the OK button to export the file.

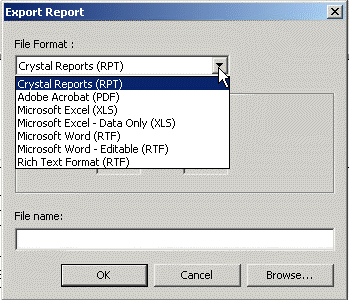
Once a document has been exported, it can be edited or altered using the appropriate software tool. For example, assume a letter is exported to a Microsoft Word (.doc) file. Once in .doc file format, the letter can be edited and reformatted as desired by using MS Word. The edited letter can also be printed from the MS Word environment.
Note: When exporting a Mail Queue item using this facility, the original Mail Item still remains in the Mail Queue and will be printed by a subsequent batch printing process. If this is not desired, be sure to delete the Mail Item from the Customer's Mail Queue.
The Print button (item 2 in the above example) can be used to print the document on a local printer. When this button is clicked, a standard Windows print dialog box is displayed. Select the desired printer and click the OK button to output the document to the specified printer. If using the Netscape Browser, the entire document will be printed; it is not possible to print a selected page or range of pages. If using the Internet Explorer browser, the Print Range area will be enabled to print all or selected pages of the report.
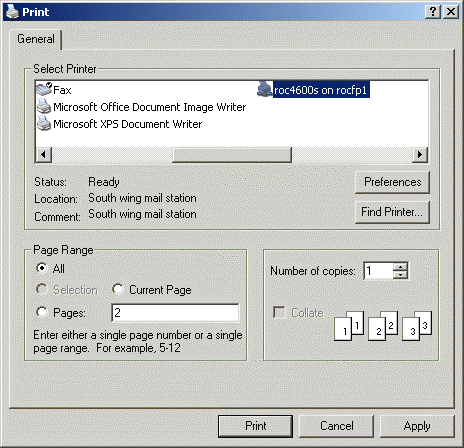
Note: Certain system reports (such as "Daily Payments" and "Summary Totals by Loan/Receivable and Status") are formatted to be printed in "Landscape" mode. When printing from the Internet Explorer browser, the report will be printed correctly without user intervention. When printing from the Netscape browser, the user needs to configure the printer in order for the report to be printed in landscape mode.
Note: When printing a local copy of a Mail Queue item using this facility, the original Mail Item still remains in the Mail Queue and will be printed by a subsequent batch printing process. If this is not desired, be sure to delete the Mail Item from the Customer's Mail Queue.
When the report viewer is initialized, a Smart Navigation Group Tree is generated based upon the groups in the report (if any). A group is often used in reports to sort data, or to otherwise organize data for display.
If the report does not contain groups and the Show/Hide Group Tree button (item 3 in the above example) is clicked, a blank page will be displayed in the Preview window. Click the Show/Hide Group Tree button again to return to the document page.
If the report contains groups and the Show/Hide Group Tree button is clicked, the Navigation Tree is displayed in the Preview window.
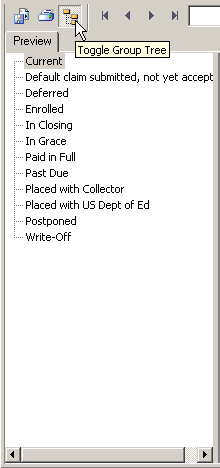
Click on a group to navigate to a specific part of the report.
The Page Navigation controls (item 4 in the above example) can be used to move forward and backward through a multi-page document. The page number for the page that is currently displayed in the Preview window, as well as the total pages in the document, are displayed in the middle of this control set. If the document consists of only a single page, the forward/backward buttons will be disabled. The backward/forward buttons function as follows (in order from left to right in the above example):
· Go to first page
· Go to previous page
· Go to next page
· Go to last page
It is also possible to proceed directly to a specific page in a multi-page document by typing the page number in the "current page" field and pressing the Enter key.
Item 5 displays the Page Number.
The Stop button (item 6 in the above example) can be used to stop the document page from being loaded into the Preview window, or to stop the document printing process. While a document page is being loaded, or the document is being printed, this button is enabled to red.
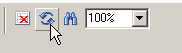
The Refresh Data button (item 7 in the above example) can be used to reload the current document page into the Preview window.
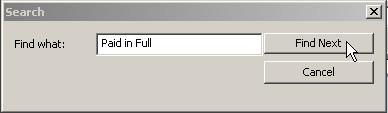
The Search Text controls (item 8 in the above example) can be used to find all occurrences of a text string in the document that is displayed in the report viewer. Enter the text to search for in the data entry box, and then click the Find Text button:
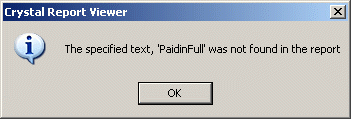
If no matching text string is found in the document (or the end of the document is reached and no further matches are found), a "Text Not Found" message will be displayed in the lower left-hand corner of the Preview window.
If a matching text string is found in the document, the corresponding document page is displayed in the Preview window within a red outline. The Find Text button can be clicked repeatedly to find all occurrences of the supplied text string.

The Zoom Control button (item 9 in the above example) can be used to increase or decrease the size of the document page that is displayed in the Preview window.
©Ellucian Campus Receivables Collector Help Center