![]()
![]()
![]()
Apply Exit Records
You can find the Apply Exit Records function under the Inbound tab. Use this function to apply borrower exits to CLM from a data file or batch that has already been uploaded to the system. In addition to adding records through this function, you can also view and delete existing data files.
Prior to applying the data to the system, you need to upload
the data through the Inbound Exit Records
function. Once you inbound (upload) the data, the system creates an entry on
the Apply Exit Records screen. From there, you can select the data and apply it
to CLM. If there are no uploaded borrower exit data files in CLM, you will see
a message that there are no files awaiting processing.
You also have the option to create and enter your own batches. Find out how to do this in the Create an Inbound Exit batch help topic.
To View a File
On this screen, you will find a list of uploaded, but
unapplied, borrower exit data files. To view the contents of any of these
files, click on the Magnifying Glass icon.
To Add Records
Use the Add Records link on the right side of the
display to add additional exit records to the selected file. See the Create an Inbound Exit batch help
topic for information pertaining to the values that may be entered into the
various fields.
To Apply a File to the System
Once a borrower exit data file has been inbounded to CLM,
the data records it contains can be applied in either an Automatic or Manual
Mode. Choose Manual Processing when you want to review and
edit the data records as they are being applied to the system.
To Apply an Inbound Exit File-Automatic Mode
To process a file automatically, first select the Yes
radio button on the Automatic Processing? selection line. Next select
the desired file(s) by clicking in the checkbox located to the left of the file
name. Once you have made your selections, click the Save icon located in
the Function Bar.
The system will edit the contents of the selected file(s),
and apply valid records to the database. When all files and records have been
processed, the Results screen is displayed, as shown below.
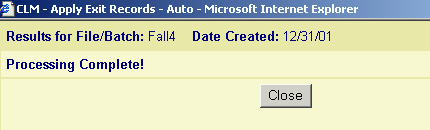
This screen will list any edit errors that were found when processing the exit records. The records that were found to be in error (if any) remain in the Inbound file as unapplied records. You will need to use the Manual Processing mode to edit these files and apply them to the system.
When you return to the Apply Exit Records screen, it is refreshed to reflect that your selected file or files have been processed. If all records in a file were successfully processed, the number of Unprocessed records is updated to 0. If one or more records had errors, the count indicates the number of records that were not processed.
To Apply an Inbound Exit File-Manual Mode
To process a file manually, first select the No radio
button on the Automatic Processing? selection line. Next select the
desired file by clicking in the checkbox located to the left of the file name.
Only one file at a time can be selected for manual processing. When a file has
been selected, click the Save icon located in the Function Bar. The file
you selected is opened in "Review/Edit/Apply" mode. Borrower Exit
records are displayed one borrower at a time via a new window.
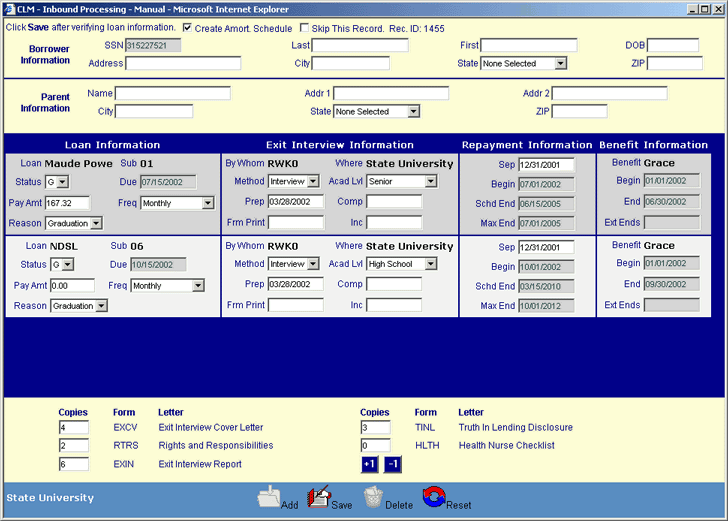
You can edit the record by clicking on the appropriate data
field and revising the field value. See the Create an Inbound Exit
Batch chapter for information pertaining to the values that may be
entered into the various fields.
You can also skip a data record by clicking on the
checkbox located in the upper left corner of the record form. Skipping is useful
when you are unable to resolve CLM edit errors, but want to continue with the
review/edit/apply process.
To apply the displayed record(s), click on the Save
icon. Clicking the Save icon will trigger an initial edit process that
validates the displayed record data. If there are not any errors, the data will
be applied to the system and the review/edit screen will be refreshed with the
next borrower exit record from the inbound file (if any). If there are errors,
they will be displayed in a pop-up dialog box. You can either edit the record
to fix the errors, or you can skip the record and continue reviewing the rest
of the records in the file.
After you have reviewed all of the records, you will notice
that the Apply Exit Records Screen is updated to reflect that all of the
records in the file were processed.
If you wish to end the review process before you have reviewed all of the records in the file, you can simply close the review/edit window. Any unprocessed records will remain in the inbound file. The file's Unprocessed records count will be updated to reflect the number of records remaining in the file.
To Delete a File
To delete one or more Inbound Exit data files, select the
desired file(s) by clicking in the checkbox next to the file name. After
selecting the file(s), click on the Delete icon located in the Function
Bar. You will be given the option to continue with the delete or cancel it.