![]()
![]()
Student System Interface Configuration
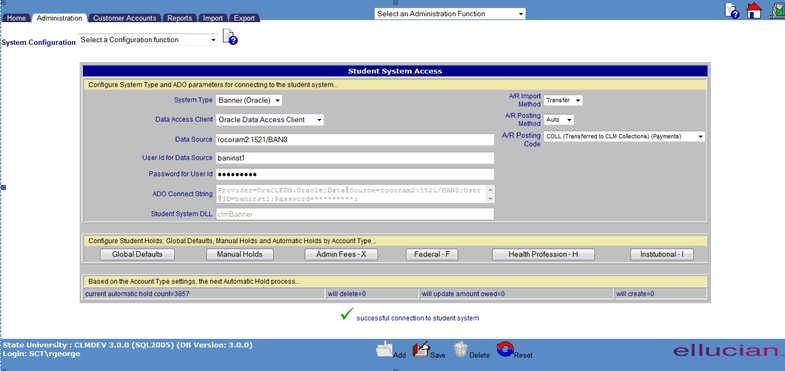
The Student System Interface Configuration esatblishes connectivity of CRC to the Oracle based Banner Student System. This connectivity allows for the functionality of both Student Holds and integration of Accounts Receivable Debt.
If you desire this feature, and do not use Banner Student, please contact CRC support .
For manual Student Information System Holds, you access Customer Services, Student System Hold to place a hold in the Student System for a Customer within CRC.
This function provides automatic setting of holds in the Student System. Thresholds must be established for amount past due and/or days past due which trigger the automatic student hold. The automatic process is initially configured to run nightly, but may be modified. The automatic process evaluates Customer Loan/Receivable data to create, update and eventually remove the hold. The Customer history shows the details of the hold update as transaction type SHLD.
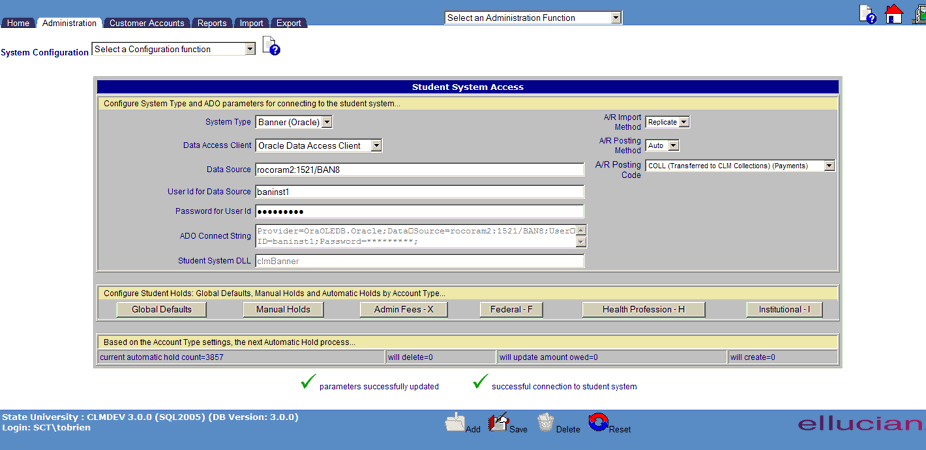
This page displays two sections: First, the Microsoft ActiveX Data Objects (ADO) parameter settings for access to the Banner system and, second, settings for the manual and automatic processing by Loan/Receivable type. The ADO section information requires the assistance of the Banner System DBA. The settings options will not be visible until you establish a valid connection to the Student system. To process the Student Holds, click on the Save icon in the function bar. When exiting the rules panel for holds, CRC may take a second or two to execute and display the forecasted update counts. Then establish the Global Defaults for all Loan/Receivable settings—manual and automatic. Global Defaults determines the Banner Student Hold Flag and Originating Office and whether you want to maintain the amount past due on each hold in the student system.
When the user clicks on any of the Student Holds buttons, a new window opens. See Student System Hold Setup for more details.
After setting all the parameters, the user clicks on the Save icon in the function bar and the screen is refreshed indicating that the parameters have been successfully updated.
***If you desire to implement collections of Accounts Receivable thru CRC, it is storngly recommended you contact the Customer Support Center to schedule implementation consultation.
Data Entry
|
Field Name |
Purpose\Usage |
|
A/R Import Method |
Transfer: CRC becomes the sole source of
debt. A transaction file of credits is created to apply Banner A/R to clear (pay-out)
the debt. |
|
A/R Posting Method |
Select the method for which you prefer transactions
from CRC to Banner A/R to be handled. |
|
A/R Posting Code |
Banner Detail Code to be used for either: |


©Ellucian Campus Receivables Collector Help Center