![]()
![]()
Customer Profile
Add Edit Delete
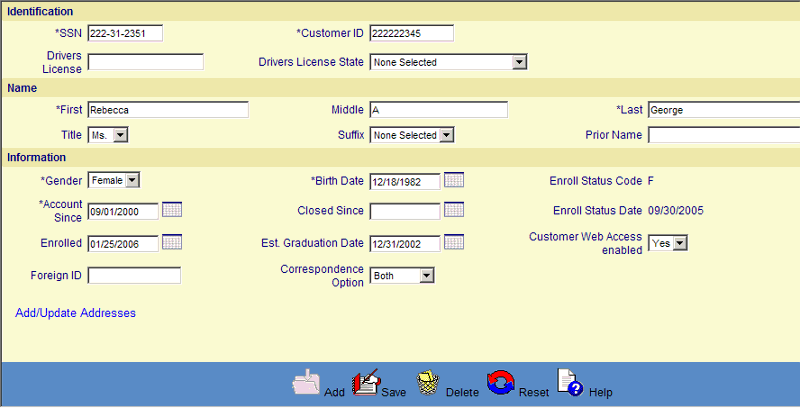
This function is displayed after performing Find a Customer. This function enables the user to perform the following actions depending on their security profile:
*Required Fields
|
Field Name |
Purpose\Usage |
|
*Social Security Number |
Effective with 3.0 if SSN is not available populate with customer ID. Format of 9 digit SSN has been removed |
|
* Customer ID |
Value must be entered. May be same as CID in SSN field. |
|
Drivers License |
If entered, Up to 25 characters available |
|
Title |
Value must be from drop-down list. |
|
*First Name |
A value must be entered. |
|
Middle Name |
None. |
|
*Last Name |
A value must be entered. |
|
Suffix |
Value must be from drop-down list. |
|
Prior Name |
A value must be entered |
|
*Gender |
Value must be from drop-down |
|
*Date of Birth |
Enter mm/dd/yyyy or use calendar next to entry field. |
|
Enrolled Status Code |
If entered, mm/dd/yyyy or use calendar next to entry field. |
|
Customer Since |
If entered, mm/dd/yyyy or use calendar next to entry field. |
|
Closed Since |
If entered, mm/dd/yyyy or use calendar next to entry field. |
|
Enrolled Status Date |
If entered, mm/dd/yyyy or use calendar next to entry field. |
|
Enrolled |
If entered, mm/dd/yyyy or use calendar next to entry field. |
|
Estimated Graduation Date |
If entered, must be greater than or equal to Customer Since Date. |
|
Customer Web Access Enabled |
Choose Yes/No from the drop-down. |
|
Foreign ID |
If entered, 15 characters available |
|
Correspondence Option |
Choose Paper, Paperless or Both from Drop-Down |
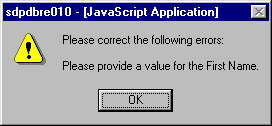
Clicking the Save icon will trigger an edit process that validates the user-entered data. If there are any errors, they will be displayed in a pop-up dialog box as shown in this example:

Click on the OK button to acknowledge the errors and return to the entry form. Modify the field(s) in error and again click the Save button. If there are not any edit errors, the Customer information will be written to the database, and the pop-up update window will be closed. The Customer List will be updated depending upon the selection criteria that were last used. Once the Customer information has been saved, the user can enter address information for the Customer. See below Review/update information for a Customer for additional information.
Note:A Customer cannot be deleted if they are currently associated with one or more Loan/Receivables. The Loan/Receivables must be deleted before the Customer can be deleted.
When the OK button is clicked to acknowledge the Delete action, an edit process is then triggered to ensure that there are no Customer Loan/Receivables. If one or more Loan/Receivables are found, an error message will be displayed in a pop-up dialog box as shown in this example:

If the Customer data complies with the edit, the Customer record will be deleted, and the pop-up window will be closed. The Customer List will still reflect the deleted Customer however. This is because the Customer record is not removed until the archive process is run, thereby enabling the user to "undelete" the record.
If a previously deleted Customer record has not been archived from the system, it is possible to "undelete" the Customer by setting the Archive Flag to "No". This will not restore any Loan/Receivable records which were previously associated with the Customer however. The Loan/Receivable records can be individually restored (if they have not been archived from the system) via the Loan/Receivable Details function.
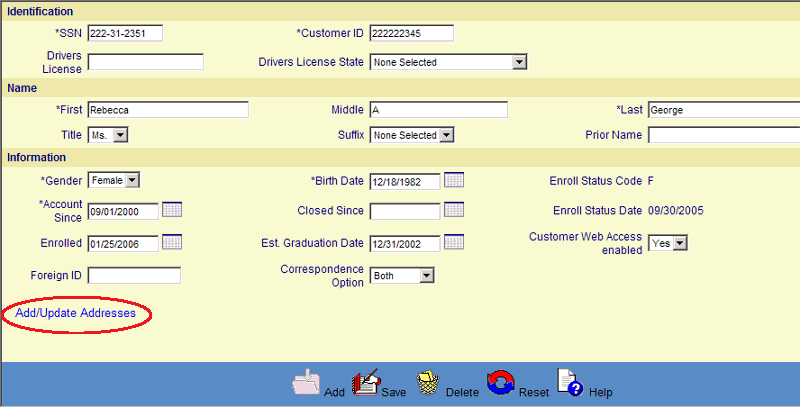
Click on the Add/Update Addresses on the Customer Maintenance screen (circled in the sample screen below) which opens a new window. See Customer Address & Phone Information help for more details.


©Ellucian Campus Receivables Collector Help Center